
Okay, so today I messed around with creating a digital artwork of Stephanie Niles. Here’s how it went down.

Getting Started
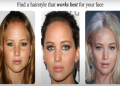
First, I needed some good reference pictures. I spent a good while browsing online, you know, just scrolling through images to find ones that really captured her features and vibe. I wanted a few different angles and expressions.
Sketching It Out
Once I had my references, I opened up my drawing program. I usually start with a rough sketch, just basic shapes to get the proportions right. It’s always messy at this stage, lots of lines everywhere, but it’s the foundation, you know?
- Blocked out the head shape.
- Added guidelines for the eyes, nose, and mouth.
- Roughly sketched the hair.
Refining the Features
This is where it gets interesting. I zoomed in and started refining the sketch. I paid close attention to the shape of her eyes, the curve of her lips, and how her hair falls. It’s all about those little details, the things that make her, her.
I Erase the unnecessary line in my canvas, and do it over and over again, until it looks natural for me.
Adding Color and Shading
After I was happy with the line art, I moved on to color. I picked colors that felt right, trying to match her skin tone and hair color as closely as possible. I also added some shading to give the drawing some depth and make it look more 3D. That part always takes a while, playing with light and shadow.

Final Touches
Lastly, I added some finishing touches. I cleaned up any stray lines, adjusted the colors a bit, and made sure everything looked just right. It’s kind of like putting the icing on a cake, I guess!
And there you have it, my finished drawing! It’s always so fun bringing to practice drawing someone.


